
How to Create an Email Account in cPanel
Creating a professional email account through cPanel is one of the easiest tasks you can perform when managing your website hosting.
The process is simple and usually takes only a few minutes. Once you receive your cPanel login details from your web hosting provider, you can create a professional email address using your own domain name.
For example:
instead of using a free email address such as Gmail or Yahoo.
In this guide, we will explain step by step how to create an email account in cPanel and access it through Webmail
What Is cPanel?
cPanel is a popular web hosting control panel that allows website owners to manage many hosting features from one dashboard.
Using cPanel, you can manage:
-
Website files
-
Databases
-
Domains
-
Email accounts
-
SSL certificates
-
Backups
-
Security settings
-
Hosting resources
One of its most useful features is the ability to create professional email accounts connected to your website domain.

cPanel Login Information
After purchasing a hosting plan, your hosting provider will normally send you your cPanel login information.
For example:
Website:
xxxx.com
Username:
xxxxxxx
Password:
xxxxxxx
Keep this information secure because it provides access to your hosting control panel.

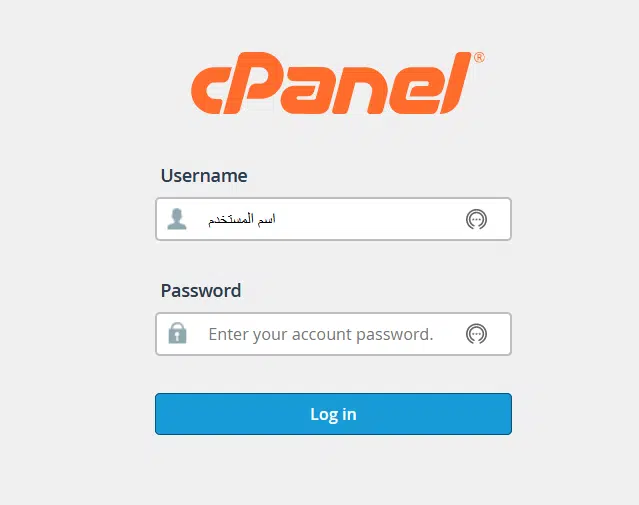
Step 1: Log in to cPanel
Open your browser and access your cPanel login page.
A common cPanel login address looks like:
Replace yourdomain.com with your actual domain name.
For example:
Enter your:
-
cPanel username
-
cPanel password
Then click Log In.
Step 2: Open Email Accounts
After logging in to cPanel, locate the Email section.
Click:
Email Accounts
This section allows you to:
-
Create new email accounts
-
Manage existing email accounts
-
Change passwords
-
Manage storage
-
Access Webmail
-
Configure email applications
Create an Email Account in cPanel
Step 3: Click Create
After opening the Email Accounts page, you will see a list of email accounts that have already been created.
To create a new email address, click:
Create
You will then be redirected to the email account creation page.
Step 4: Enter the Email Account Information
On the email creation page, you will see several fields.
Domain
Choose the domain name that you want to use for the email account.
For example:
yourdomain.com
Username
Enter the name you want to use before the @ symbol.
For example:
info
Your final email address will become:
You can also create addresses such as:
Password
Create a strong password for the email account.
A strong password should contain a combination of:
-
Uppercase letters
-
Lowercase letters
-
Numbers
-
Special characters
Avoid using simple or easily guessed passwords.
Storage Space
Depending on your hosting plan and cPanel configuration, you may also be able to select how much storage space the email account can use.
Choose an appropriate limit according to your needs.
Create
After entering all required information, click:
Create
Step 5: Confirm the Email Account Was Created
After clicking Create, cPanel should display a confirmation message indicating that the email account has been created successfully.
You should also see the new email address in your list of email accounts.
For example:
Email:
sss@xxxxx.com
Password:
xxxxxx
The information above is only an example. Your actual email address and password will be the information you entered when creating the account.
Step 6: Open the Email Using Webmail
After creating the email account, the next step is to access your inbox.
You can use Webmail to send and receive messages directly through your browser.
From cPanel, locate your new email account and click the option that allows you to check or access the email.
Depending on your cPanel interface, this may appear as:
Check Email
or
Access Webmail
Step 7: Access Roundcube Webmail
Many cPanel hosting accounts use Roundcube as their Webmail interface.
Roundcube allows you to:
-
Read emails
-
Send emails
-
Reply to messages
-
Forward messages
-
Manage contacts
-
Create folders
-
Organize your inbox
-
Add email signatures
Once Webmail opens, you can start sending and receiving messages using your professional domain email.
Why Use a Professional Domain Email?
Using an email address connected to your domain provides several advantages.
For example:
usually appears more professional than using a personal address such as:
A professional domain email can help you:
-
Build customer trust
-
Strengthen your brand identity
-
Present a more professional image
-
Organize company communications
-
Create separate emails for different departments
For example, a company can create:
Tips for Securing Your cPanel Email Account
To protect your business email, follow these recommendations:
-
Use a strong password.
-
Never share your cPanel password.
-
Change passwords periodically when necessary.
-
Enable two-factor authentication if your hosting provider supports it.
-
Avoid opening suspicious email attachments.
-
Keep your devices protected and updated.
-
Monitor your email account for unusual activity.
-
Maintain regular website and hosting backups.
Email security is important because compromised email accounts can be used for spam, phishing, or unauthorized access.

Can You Use the Email on a Mobile Phone or Computer?
Yes.
After creating your cPanel email account, you can usually configure it on different applications and devices.
For example:
-
Microsoft Outlook
-
Apple Mail
-
iPhone Mail
-
Android email applications
-
Thunderbird
You will normally need information such as:
-
Email address
-
Password
-
Incoming mail server
-
Outgoing mail server
-
IMAP or POP3 settings
-
SMTP settings
These configuration details are usually available from the Connect Devices or email configuration section inside cPanel.

Conclusion
Creating a professional email account through cPanel is a simple process that can be completed in just a few steps.
First, log in to your cPanel account and open Email Accounts. Then click Create, enter your preferred username and password, select your domain, and create the account.
Once the email account has been created, you can access it through Webmail and start sending and receiving emails immediately.
Using a professional email address connected to your domain can help strengthen your brand image and make your business communications look mo
professional